2-2-13 Update: New Soldereless LEDs make it even easier: http://makersled.com/?p=722
There are a lot of folks out there that don’t like the idea of soldering LEDs. If you are building a small fixture, or you have a little more money than patience, these BJB connectors might be for you.
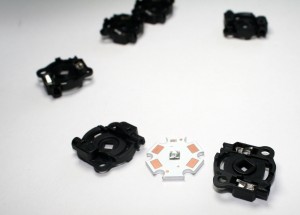
BJB connectors are like little helmets for your LEDs that provide solder-free electrical connections by using spring loaded contacts which make contact with the LED pads and wires.
The #4-40 LED mounting screws included in the MakersLED kit work perfectly with BJB connectors. It will take a little practice to get the screws into the connector and then into nuts in the heatsink. By the second BJB install, I had it figured out. 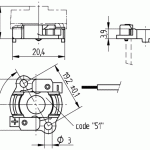
Before you go with these connectors, check with your LED vendor to make sure the LED stars you want are compatible.
The BJB connectors are labled (+) and (-). When you place the connector on the LED, confirm that the plus/minus labels on the LED starts match that embossed on the connector.
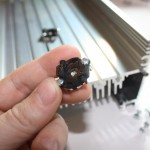
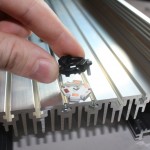
1. Align the +/- pads on the LEDs to the +/- on the connector. Start by installing the LEDs w/ BJB at the edge of the fixture.
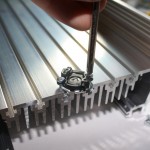

2. Screw the LEDs down enough so the nut won’t fall out, then slide them into place on the fixture.
If you are running your LEDs over 700mA you should use thermal grease or paste on the back of the LED. You will lose some grease sliding it around on the fixture, this is OK. Very little grease is needed – just enough to fill in the minute imperfections in the back of the LEDs.

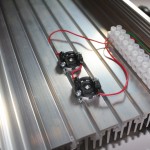
3. Wire the LEDs. Use solid core wire so it is easy to push into the BJB wire contact. Connect the LEDs in series, so the + goes to the – on the next LED, and so on. If you don’t know how many LEDs you can string together with your power supply, ask your vendor.
Don’t forget to add a tiny tab of thermal paste or grease under each star LED.
BJB connectors are available at:

www.LEDGroupBuy.com


i have read through this entire thread and while it has really enlightened me, im still lost in what i should choose, lol.im looking for supplementation only. my tank is 24x24x26(tall), lights are 13″ off waters surface and i am currently running 2 orapheks pr-25 uv’s and two 21w 15-20k led bulbs (not sure of the brand, but they are all blue-ish, tey seem to be pretty good for a grow type light, but does wash out the tank a bit).the tank is only housing acans and a ric/yuma garden. so my goal is to go make every possible color pop out, i have no idea what leds to use, how many, what optics and then how to put it together.hoping people couod shed some light and help me out.
You may want to pick up some red, green, and cyan/turquoise LEDs top pop the colors. LEDGROUPBUY.com makes some “ocean coral whites” which may want to check out.
UPDATE — NEW SOLDERLESS LEDs AVAILABLE!
http://makersled.com/?p=722